Ladies' Wreath

This traditional block received this name by the Ladies Art Company in the late 18oo's. Here is a little history and a free tutorial. A full download is available at the end of this tutorial.

Please note that if you make a purchase using any affiliate links in this post, I may receive a small commission. This allows me to continue to create and share free content such as this.

Late last year I had a baby shower coming up and wanted to gift the sweet mama to be a baby quilt.  I was feeling a bit uninspired by what I already had and pulled out my Quilt Blocks Made Easy book for inspiration. 

(As an aside, I love these books.  They contain traditional quilt blocks with basic instructions for their construction.  They won't tell you how to make the HSTs or FG so you'll need some basic knowledge, but they're a great idea resource.

Buy on Amazon

For this baby quilt, I wanted a fairly simple, traditional design that would allow some really sweet fabrics to shine. As I flipped through my book, I saw Ladies' Wreath and the simple HST design seemed just right. I started cutting the fabrics and was ruminating on the block's name. I was curious why it was called "Ladies’ Wreath" so, as one does, I later started to dig into it a little. What I found about this block’s 19th century history fascinated me. It’s called "Ladies’ Wreath" to represent the floral wreaths that were placed at funerals. "A bit macabre" I thought, "but why?"

I stumbled upon a blog that was part of a quilt along started in 2012 to commemorate the fight leading up to the 1920 passing of the 19th amendment, which gave women the right to vote in the US. You can access the blog here, but I've summarized it below.

Historically childbirth was quite dangerous and many women did (and still do) die from complications. There are many aspects we could get more into, but suffice it to say, when 1 in 5 births resulted in the death of the child, mother, or both, it was not to be taken lightly. Multiple subsequent pregnancies could become even more dangerous to the mother depending on complications she endured previously. She might be cautioned by physicians at the time to avoid becoming pregnant in the future. But here’s the rub - in many instances it was illegal for those physicians to advise a woman on how to actually avoid said pregnancies. In other words, "don’t get pregnant." "How?" "I can’t tell you". Further complicated by the fact that women were viewed as the property of their husbands and expected to acquiesce to his desires, regardless. Not to mention marital rape was not recognized.

Turns out, there was a growing group of women that were fed up with these double standards regarding their rights. Many were also associated with the growing suffragette movements and they adopted this quilt block as a quiet way to protest these issues, in addition to more overt protestations.

I really would love to know more from some primary sources (this blog unfortunately doesn't list any). I've since reached out to the writer of the Quick and Easy Block Tool, Connie Chunn, since she has some background in quilt history. I will hopefully have more information to share soon.

Regardless, I started to make the baby quilt (almost didn't use this block given it's history. Wasn't sure if that would be weird for a expecting mama) but decided to move ahead.

I decided to make 16" blocks. This would allow for fairly big HSTs so the cute designs in the fabric would show. I have some Riley Blake prints, mostly from the South Hill collection by Cotton and Joy, and a pretty denim blue Moda Bella solids for the background.

A 16" block needs 4" finished HSTs. I decided to make them two at a time so I would have even numbers for the block and the quilt without any extras leftover.

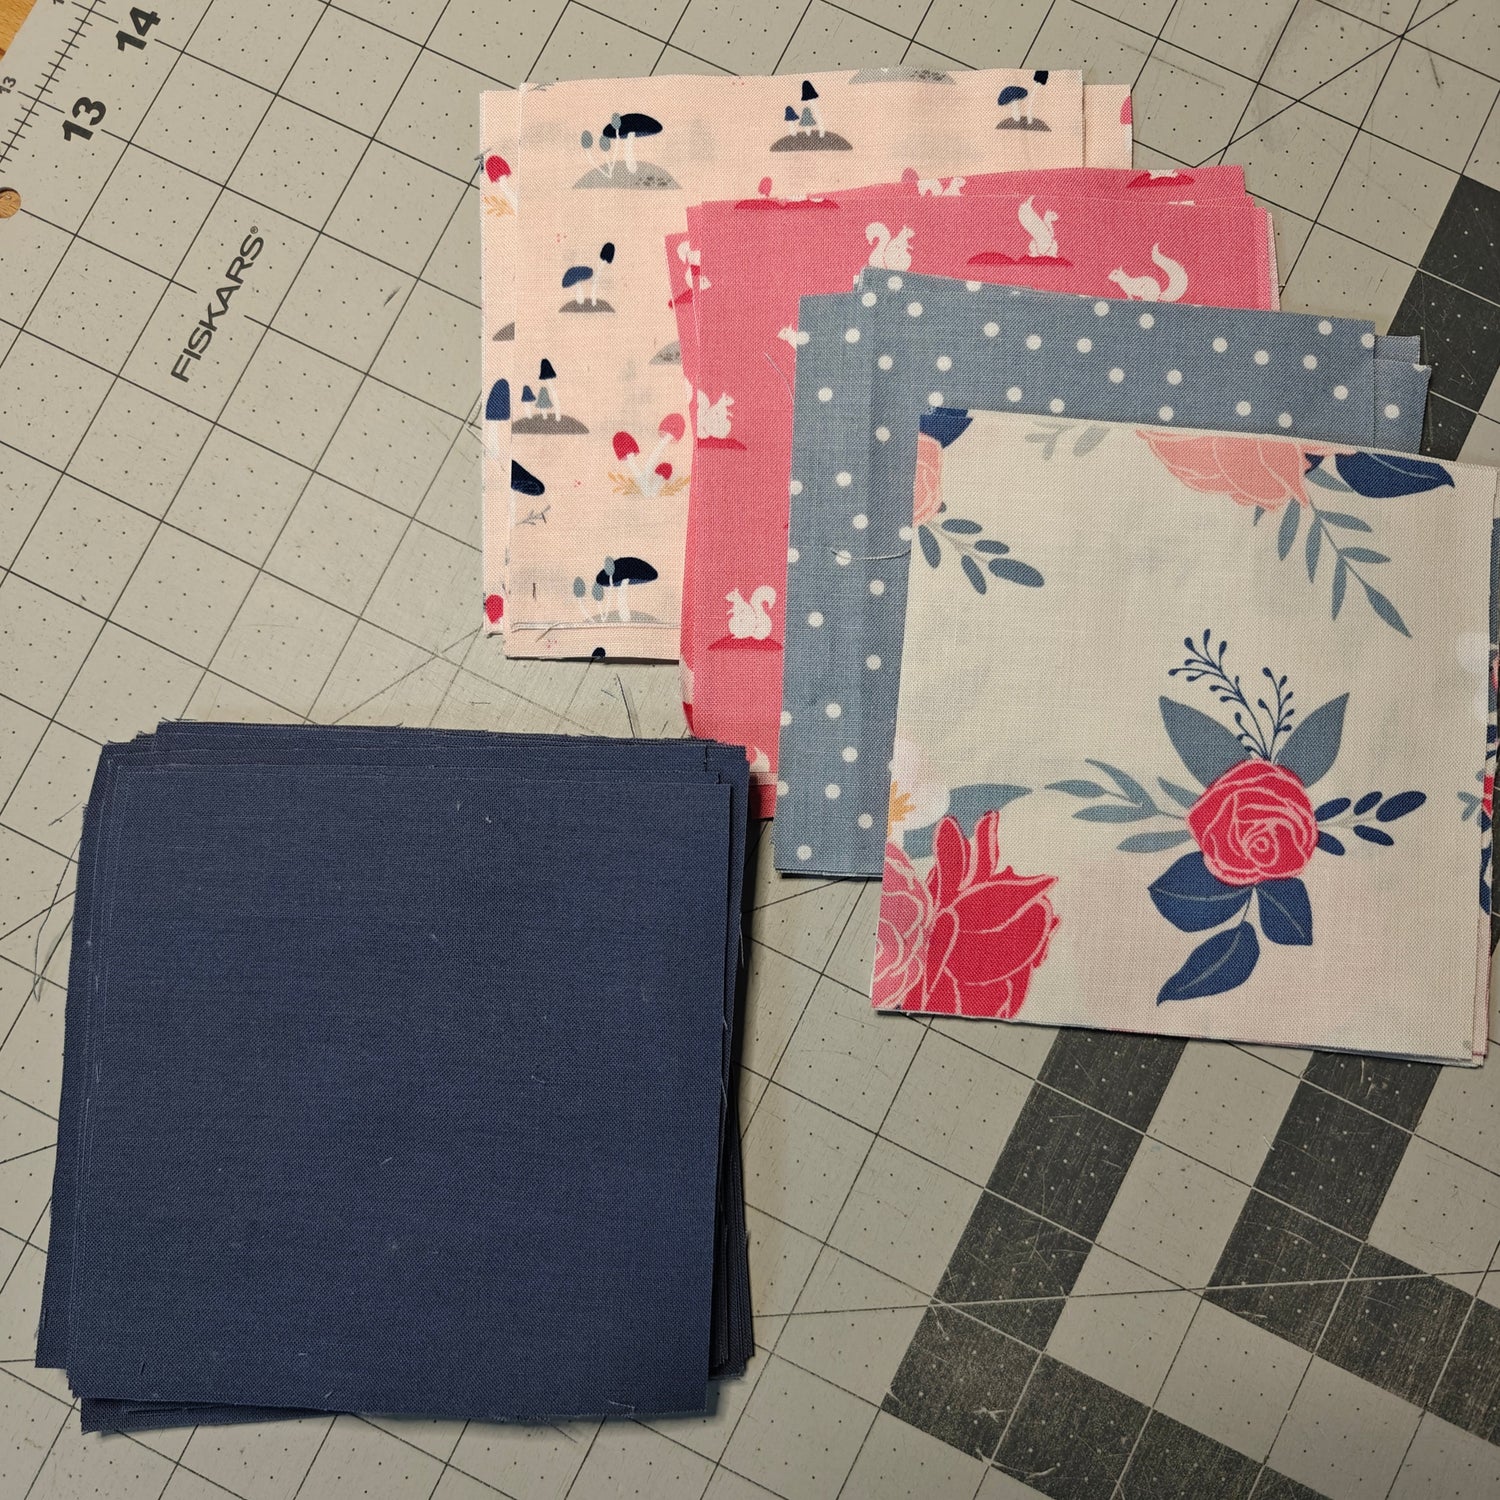
I start by cutting my fabric squares. For 4" finished HSTs, I start with 5" squares. From (1) background square and (1) print, I will get (2) HSTs. For each block, I need a total of (4) HSTs of one color, and (8) HSTs of another. I also need (4) background squares that are 4 1/2" and those get set aside for now.

On the back of the lighter fabric I drew a diagonal line between opposite corners. Then with fabric right sides together, I sewed 1/2" on either side of the drawn line.

Next they two halves are cut apart on the drawn line, and I press them open. (I prefer open seams but you could pressue to either side for this, however you chose).

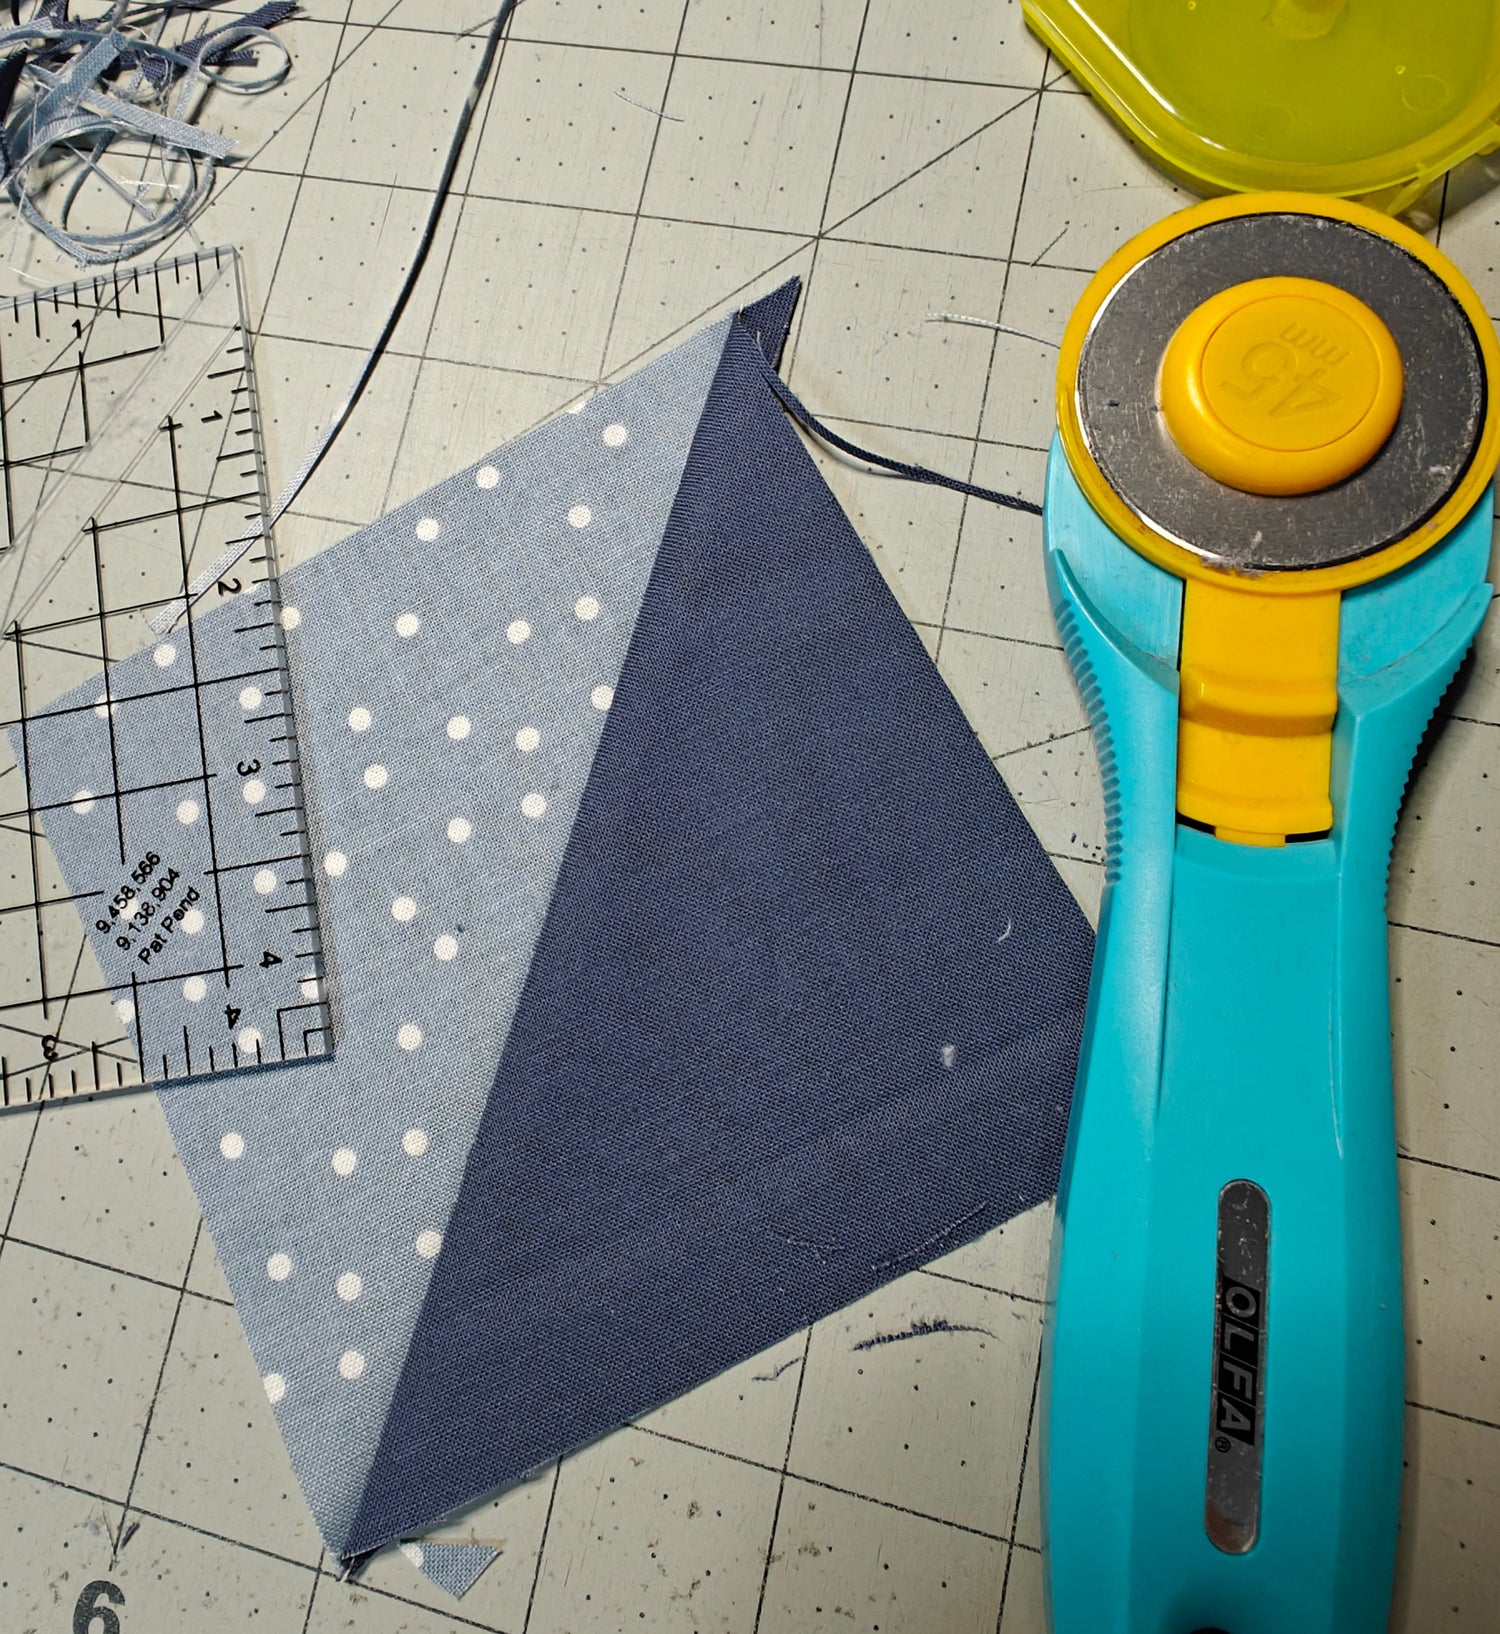
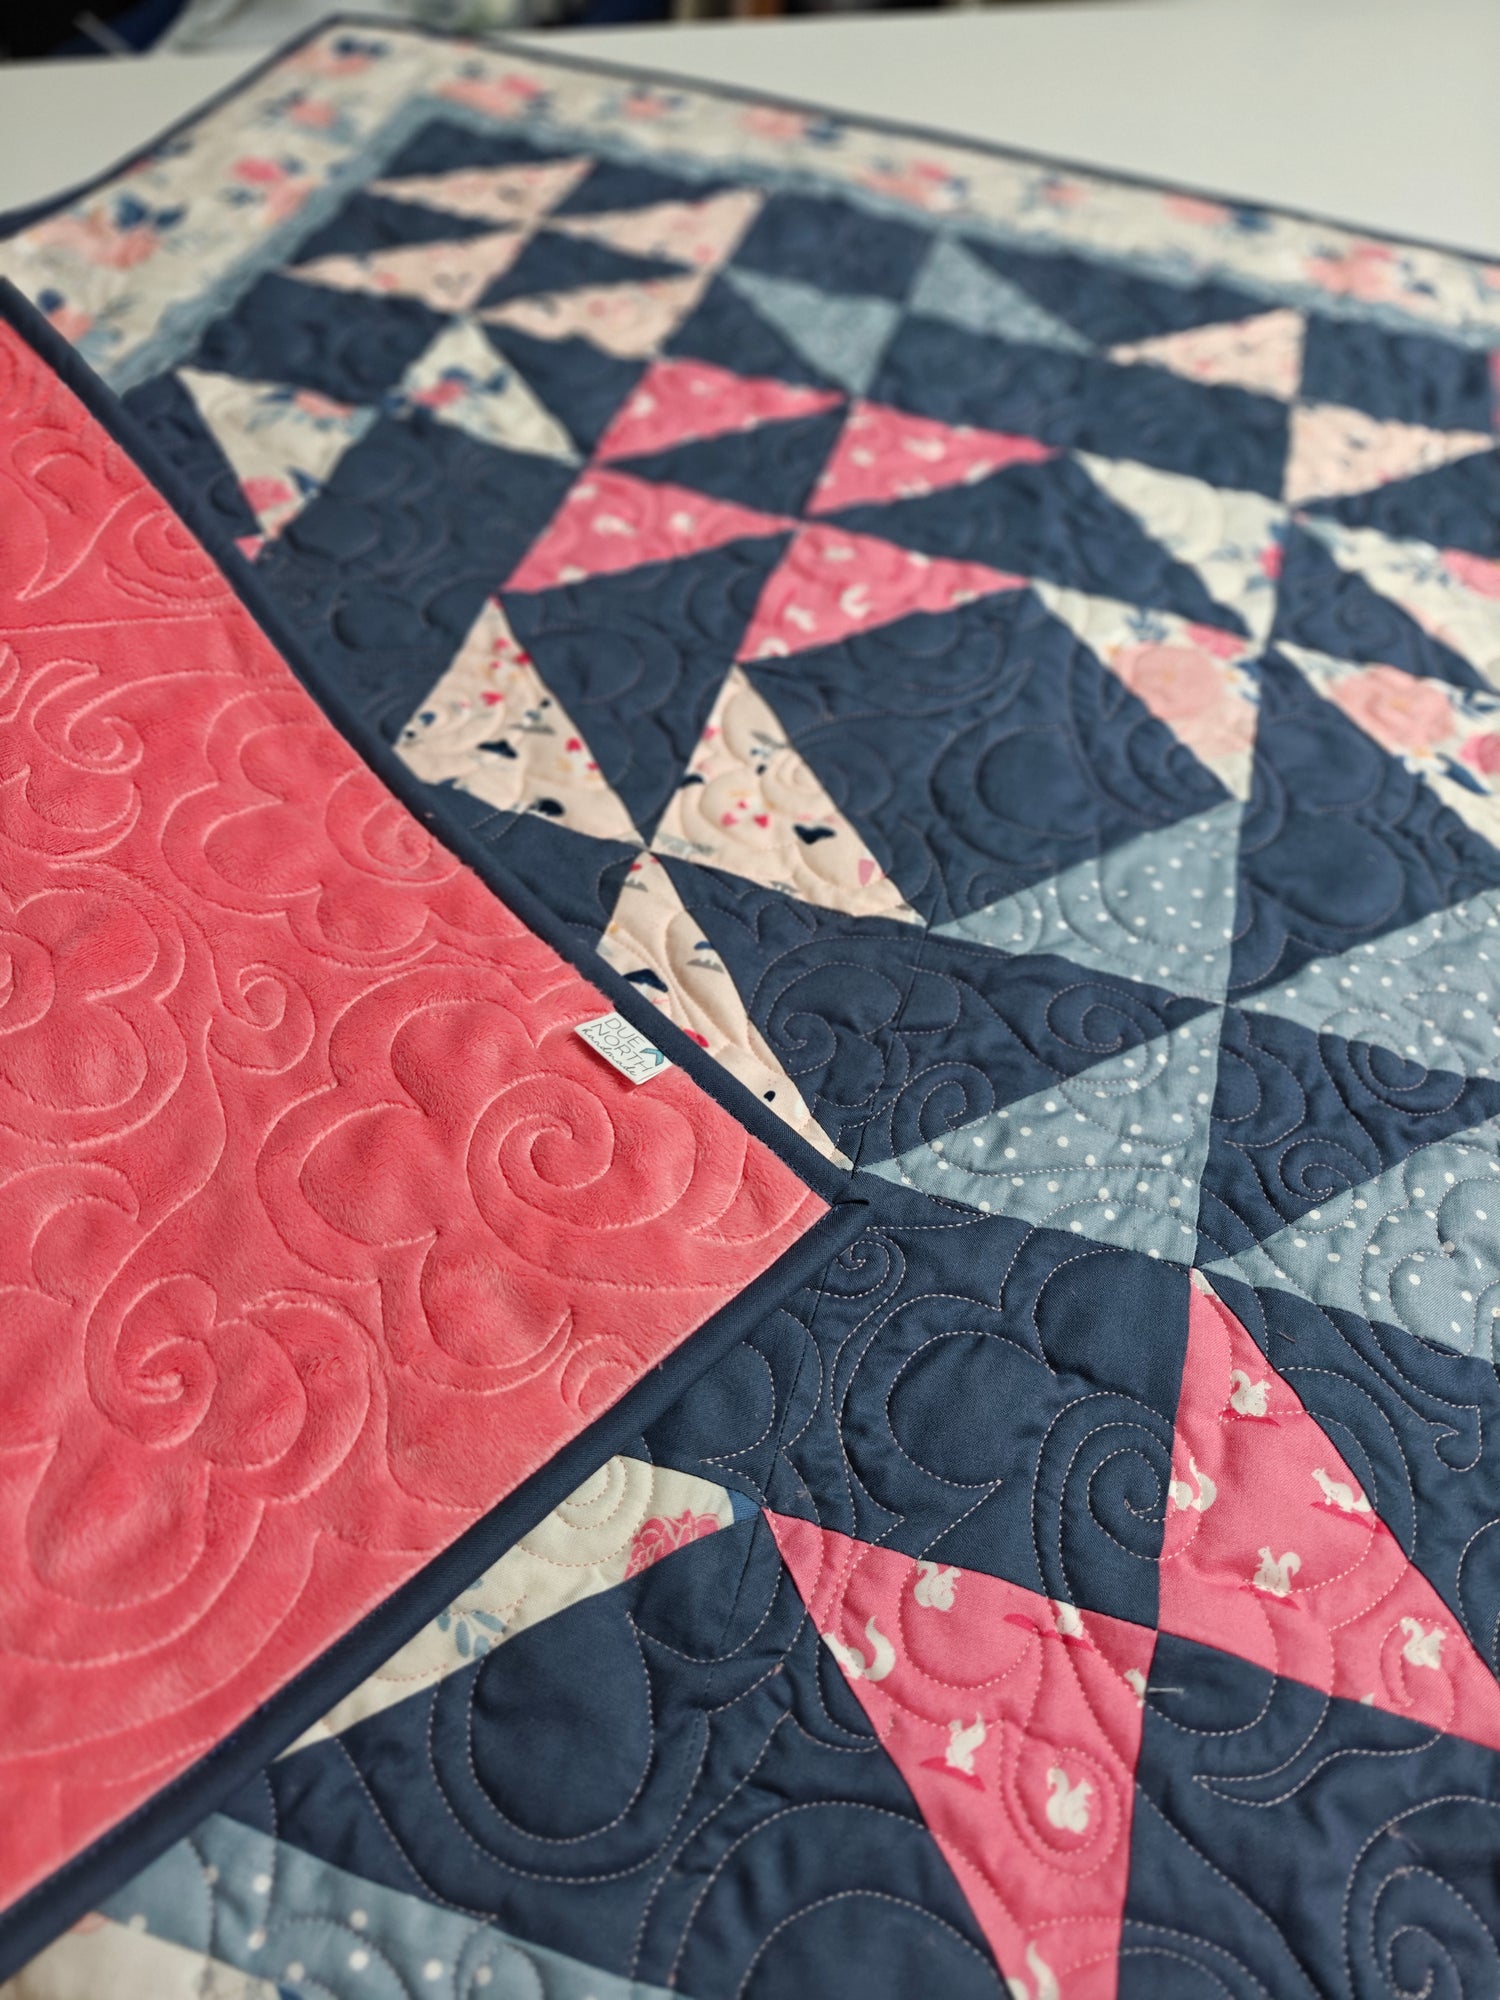
The HSTs are a little oversized and usually a little crooked, so I always make them a little big so I can square them up and trim them to the right size. Using my trusty Olfa rotary cutter and a clear quilting ruler, I line up the seam on the 45 degree mark on the ruler and then trim each to 4-1/2" square. (For these I actually used a really handy specialty template by Bloc-Lock. I have this and my other favorite notions linked here in my amazon storefront).

You don't need the specialty ruler but I do find that when I am trimming a lot at once, they do help the process go a little faster.

find these tools on Amazon

Once the HSTs are all trimmed up, then it's a matter of laying out the block and sewing it together. I sew together quadrants. If you look, two quadrants are (4) HSTs, and two are (2) HSTs with (2) squares.

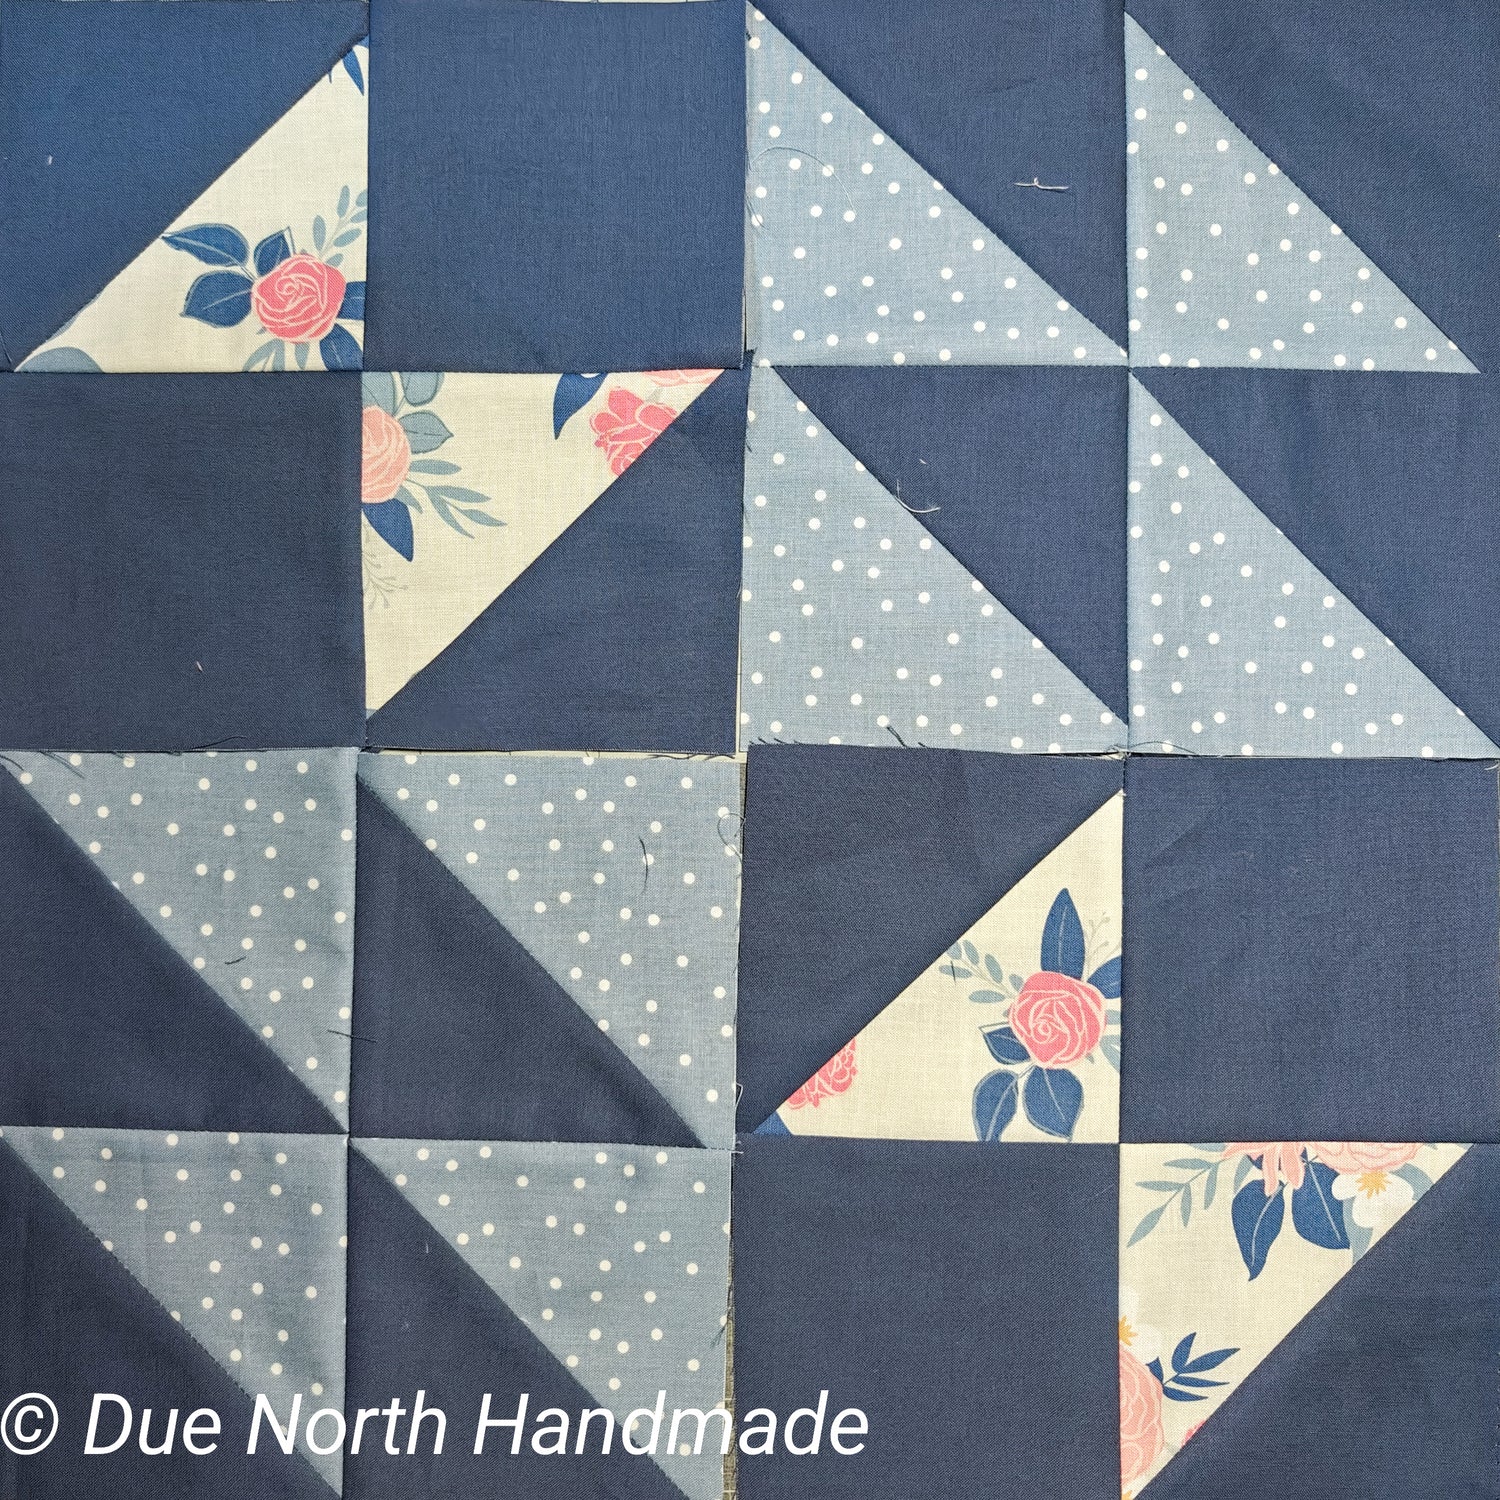
The traditional block uses two fabrics (plus the background). Laying it out that way, I end up with something like this.

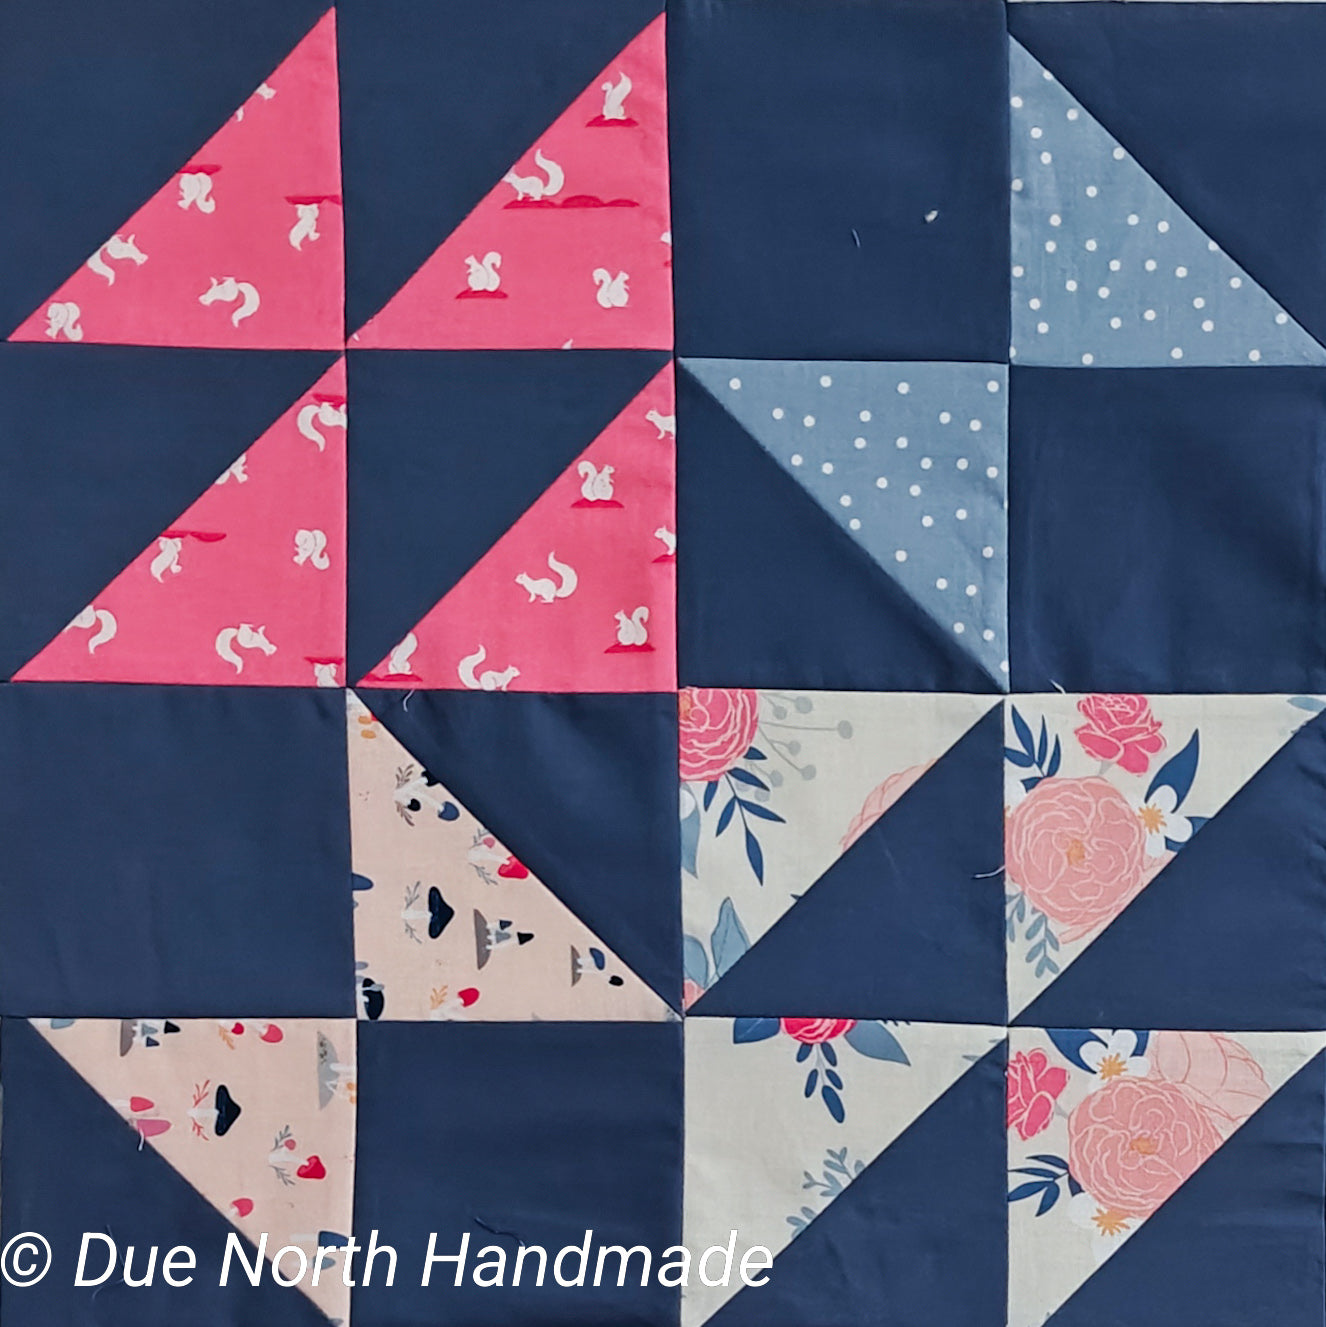
But you know what? I want something a little scrappier, so I mixed up the prints so each block used four.

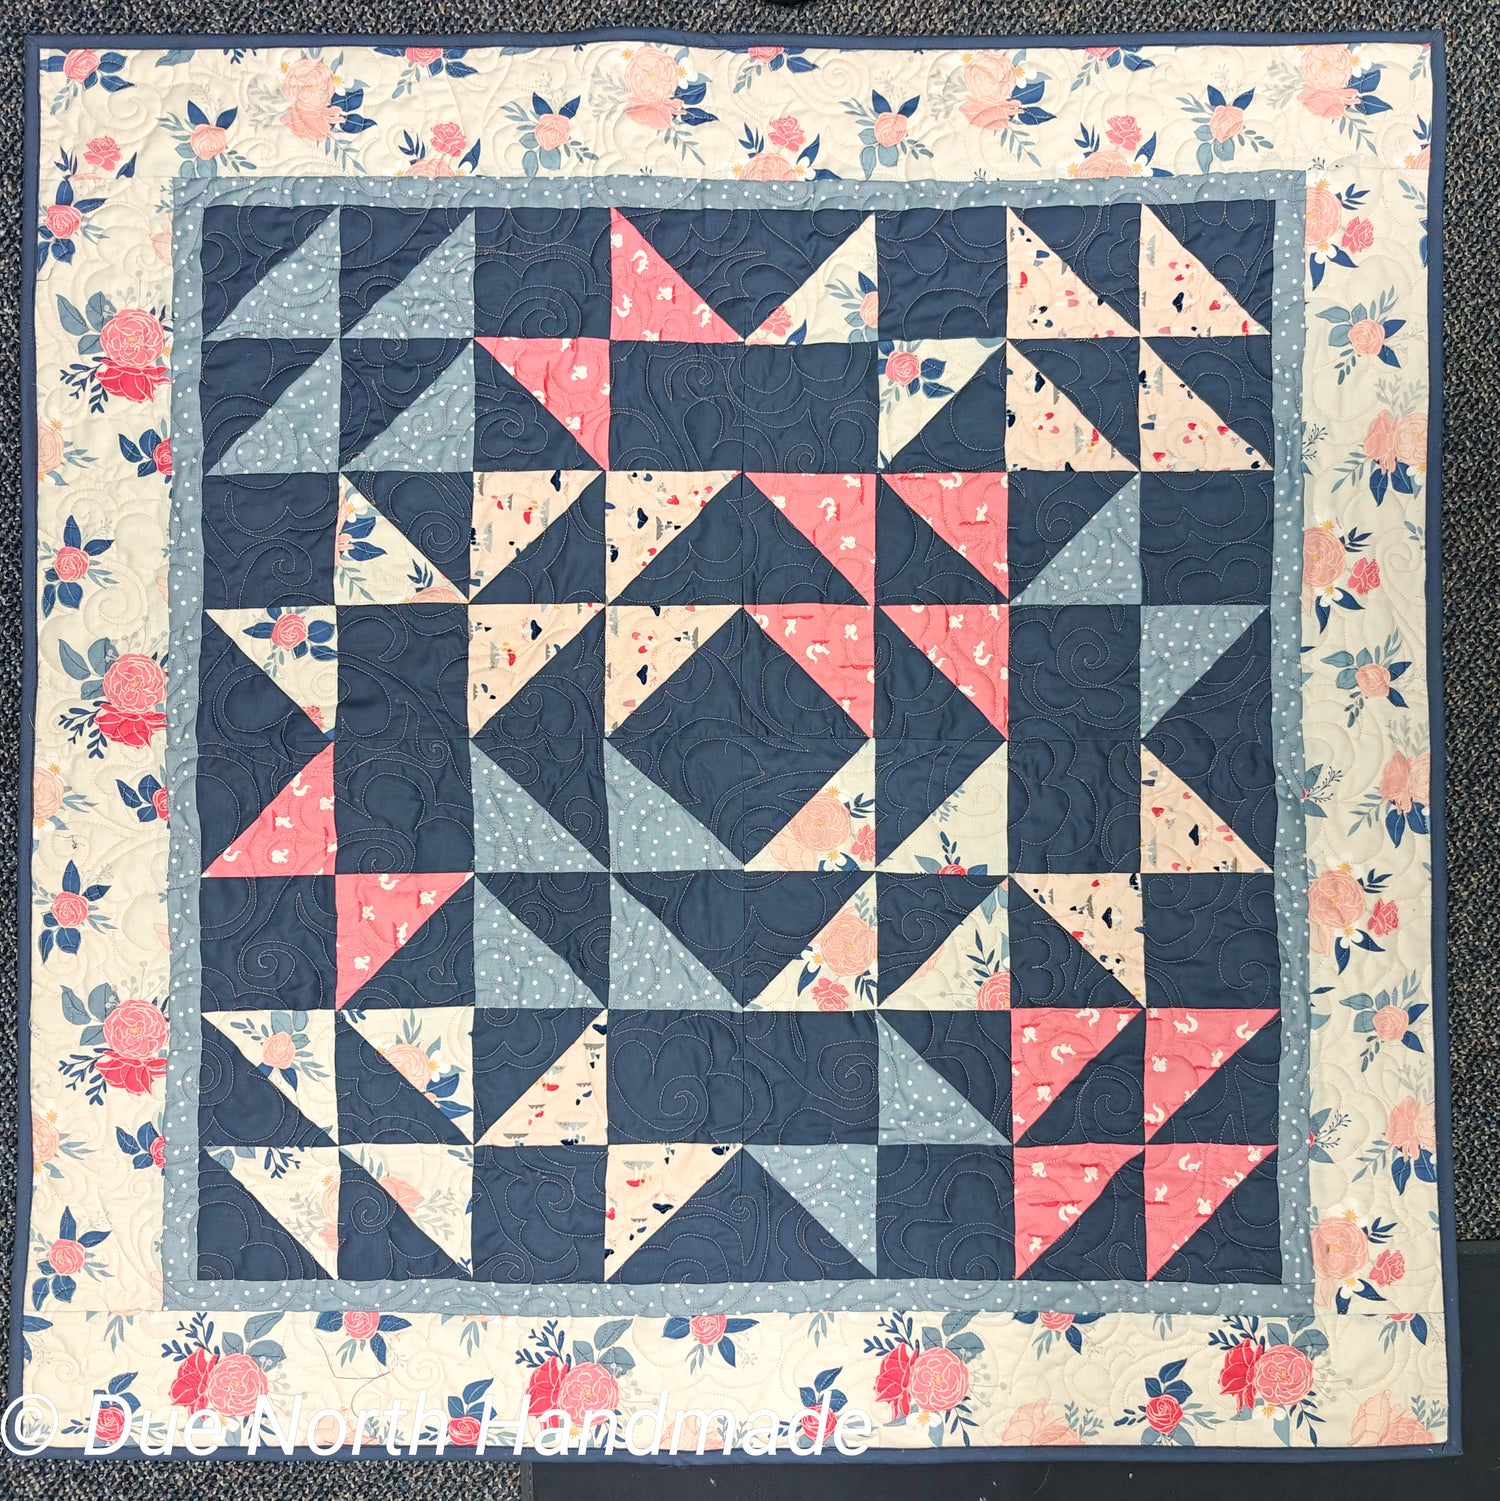
Then it's a matter of arranging all my blocks and sewing them together. I added two borders to finish this baby quilt and to have it finish around 40" square. I like how borders can frame a quilt, especially one that is a little scrappy and a little traditional. It's like the icing on the cake.

And that's it!

Thank you for following along. If you use these instructions, tag me on social media with @DueNorthHandmade and #DNHLadiesWreath. Enjoy this traditional quilt block and I hope you found that little bit of historical context interesting!

Ladies' Wreath Quilt Pattern

I've written these instructions out with fabric requirements that you might need for other sizes, if you prefer. You can access them here.

Download pattern

Late last year I had a baby shower coming up and wanted to gift the sweet mama to be a baby quilt.  I was feeling a bit uninspired by what I already had and pulled out my Quilt Blocks Made Easy book for inspiration. 

Back to blog

Leave a comment

Please note, comments need to be approved before they are published.